Hello Everyone! If you have sewing for a hobby, you know that there is always that one (or more… ups!) fabric in the storage that is just sooo beautiful, but you cannot find a right pattern for it, and it ends up laying around for ages… For me, this gorgeous plaid stretch fabrics was exactly that – I had in for almost a year, until I finally got the courage to take the scissors and cut it (for me, it’s a LOT of time, as I don’t like storing fabrics at all). But the result was totally worth the wait, as this dress instantly became one of my favourites and I always grab it from the closet if I need extra confidence boost (yes, the saying “Look good – feel good” is actually true)! I would like to also share with you some tips that I learned in my sewing school (second and last year here!) – hope they will be as helpful to you, as they were for me!
And here we go with the sewing tips – let me know if you find them useful!
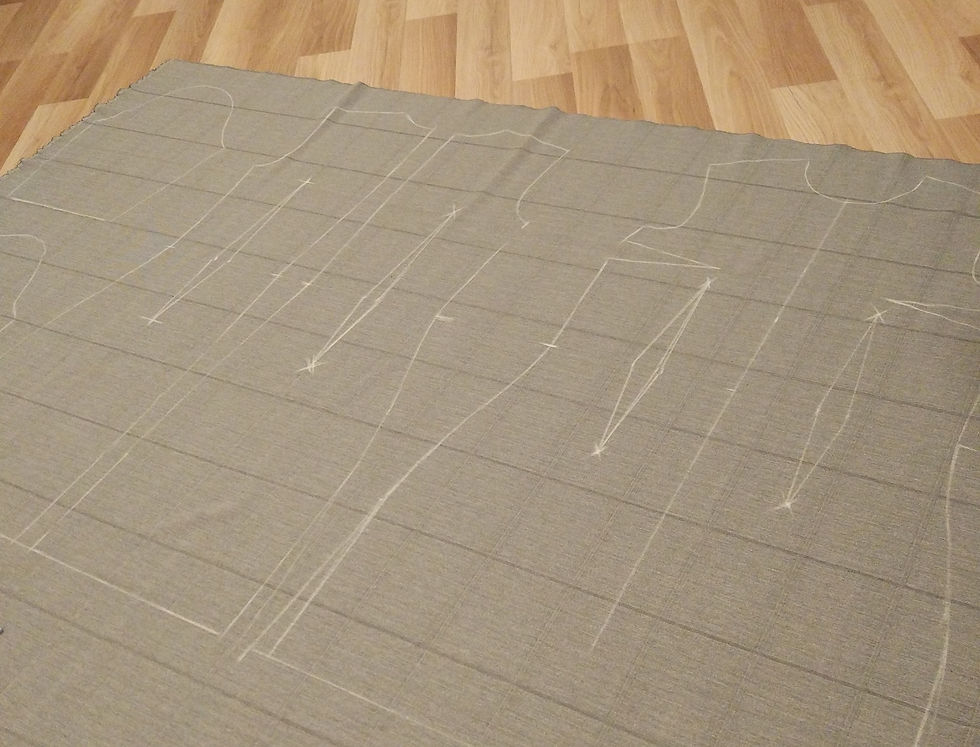
SEWING TIP No. 1: when cutting plaid, don’t fold your fabric – draw and cut each pattern piece separately (this will help to match all lines nicely together; also, will prevent from any deviations or some weird line miss-placings (seriously, is there more annoying thing than realising you cut pattern with one plaid column being 1cm away from the center of the dress?)).

SEWING TIP No. 2: before sewing invisible zipper (or any zipper, for that matter) don’t forget to add fusible interfacing on the wrong side of the dress, all along the zipper placement (placement is marked with arrow in the photo below). This will stabilise the fabric for the zipper and it will be much easier and more accurate to install it.

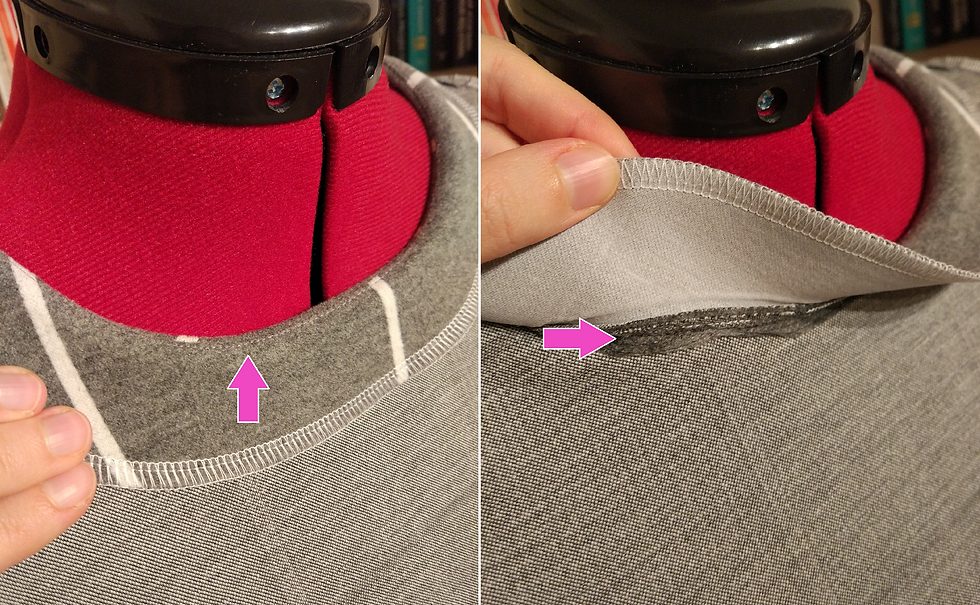
SEWING TIP No. 3: to make a nicely round neckline, I use following tricks: leave 3-5mm for seam allowance, not more (this allows the neckline to be nicely shaped and round); use fusible interfacing (stabilising band), when stitching the dress and neckline together (arrow pointing on the right photo is showing the fusible interfacing; this secures the neckline and prevents it from stretching); make one final seam stitching together lining and seam allowance, along the neckline (arrow pointing in the left photo below; this secures the lining in the wrong side of the garment and prevents it from appearing on the good side).


Comments